
This guide takes you from a blank account to a finished MP4 using Topic to AI Story, the most popular format. Every other format follows the same four beats — choose, generate, edit, render — so once you’ve done this once, the rest of Crealix will feel familiar.
Before you start: creating and previewing videos works on every plan, including free. Exporting the final file (render, download or publish) needs an active plan. The example below was estimated at 3 credits with the cheapest settings, and about 86 credits with five animated AI clips.
1

Sign in

Go to crealix.ai and sign in with Google or with a one-time code sent to your email — there are no passwords to remember.The very first time you sign in, Crealix takes you straight to the video creator so you can start right away.
2

Open the creator

Click Create Video at the top of the sidebar, or press C anywhere in the app.
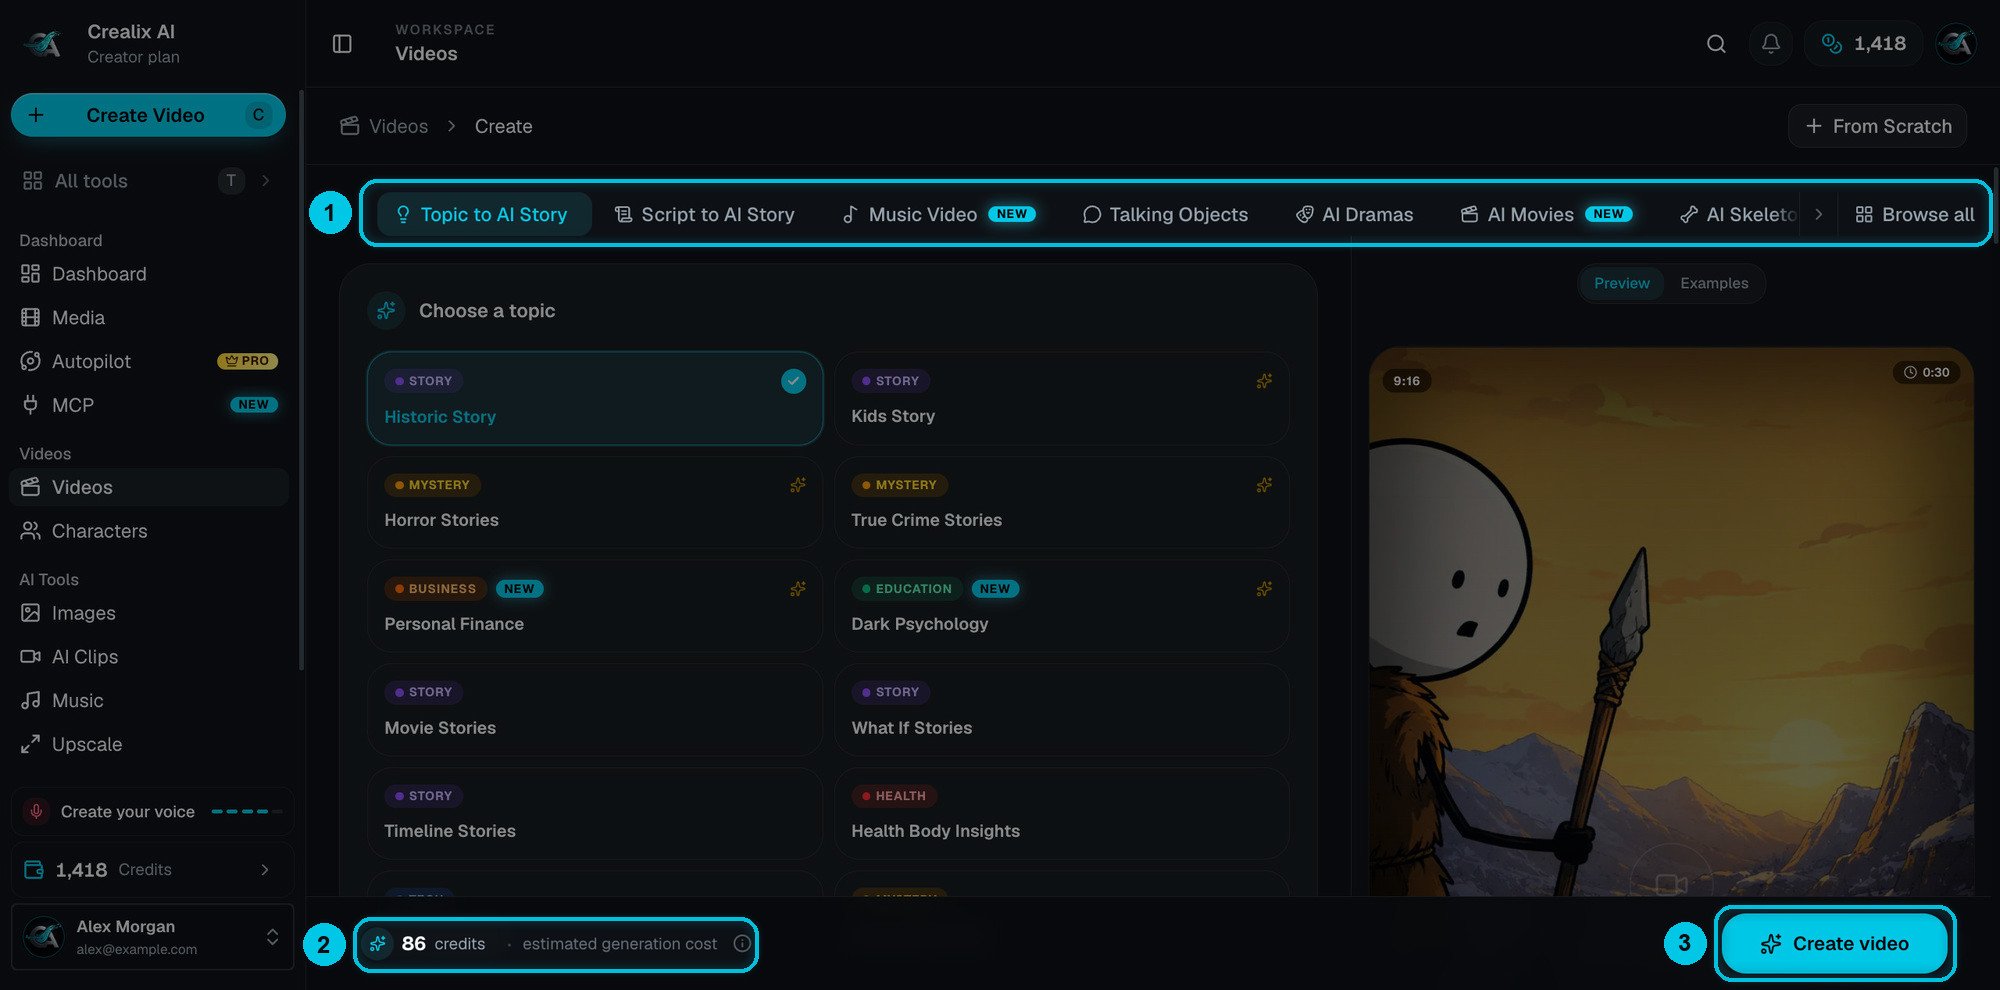
The Crealix video creator with the Topic to AI Story tab open

The creator: ① format tabs · ② live cost estimate · ③ Create video

The creator has three areas:
  • Format tabs (①) — one tab per video format. Browse all opens the full catalogue, and From Scratch (top right) opens a blank Studio project.
  • The form (left) — every setting for your video, in order from top to bottom. Each section can be collapsed.
  • Preview (right) — a live summary of your choices. Switch to Examples to watch finished videos made with the same format.
The bar at the bottom always shows the estimated cost (②) and the Create video (③) button.
3

Choose a topic

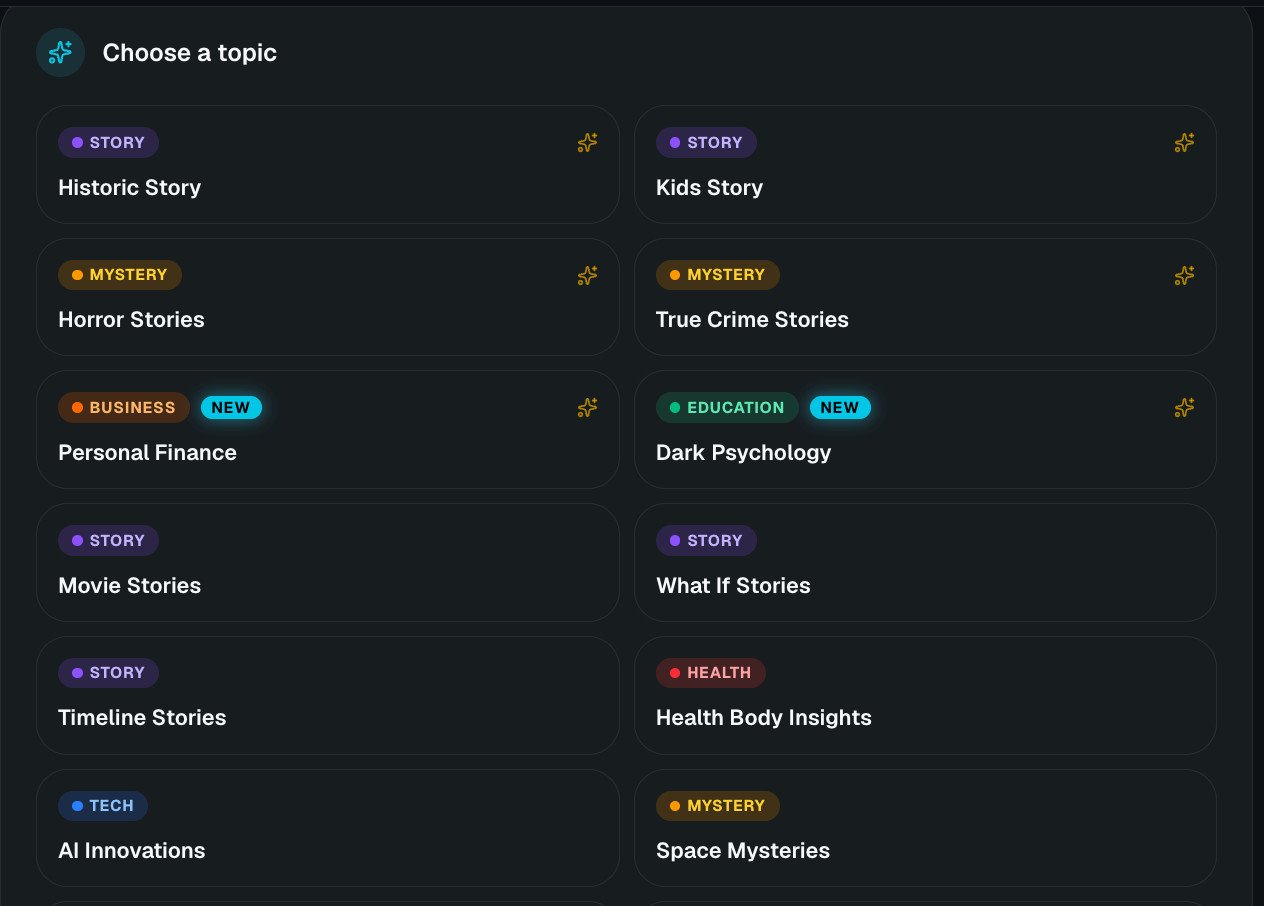
Pick the kind of story you want. Each card has a category tag — Story, Mystery, Business, Education, Health or Tech — so you can scan quickly.
Grid of topics such as Historic Story, Horror Stories and Personal Finance

Topics are grouped by category. Pick one to tell the AI writer what kind of video to make.
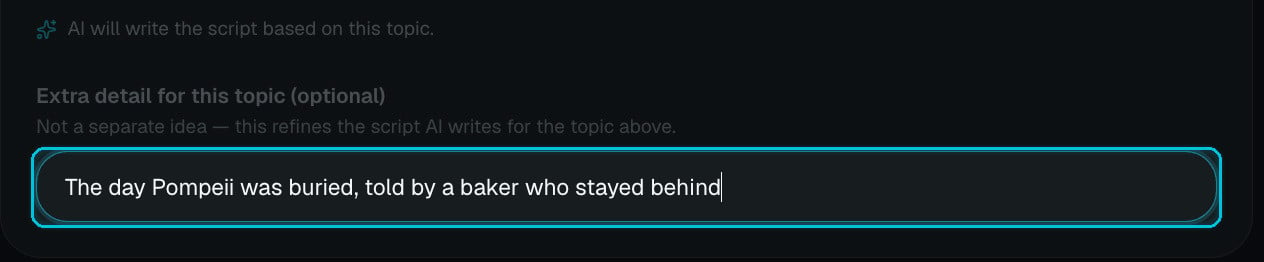
Below the topics, Extra detail for this topic lets you steer the script. It doesn’t replace the topic — it narrows it down.
The extra detail field with an example about Pompeii
Good extra details are specific: a person, a place, a moment or a twist. “The day Pompeii was buried, told by a baker who stayed behind” gives a much stronger story than “Pompeii”. Want to write every word yourself? Use Script to AI Story instead.
4

Add characters (optional)

Add characters (up to 4) keeps the same people looking the same in every scene — and in every episode if you turn the video into a series. The first character is the lead: the AI opens the video on them.Skip this for your first video. When you’re ready, read Characters.
5

Set the format, duration and language

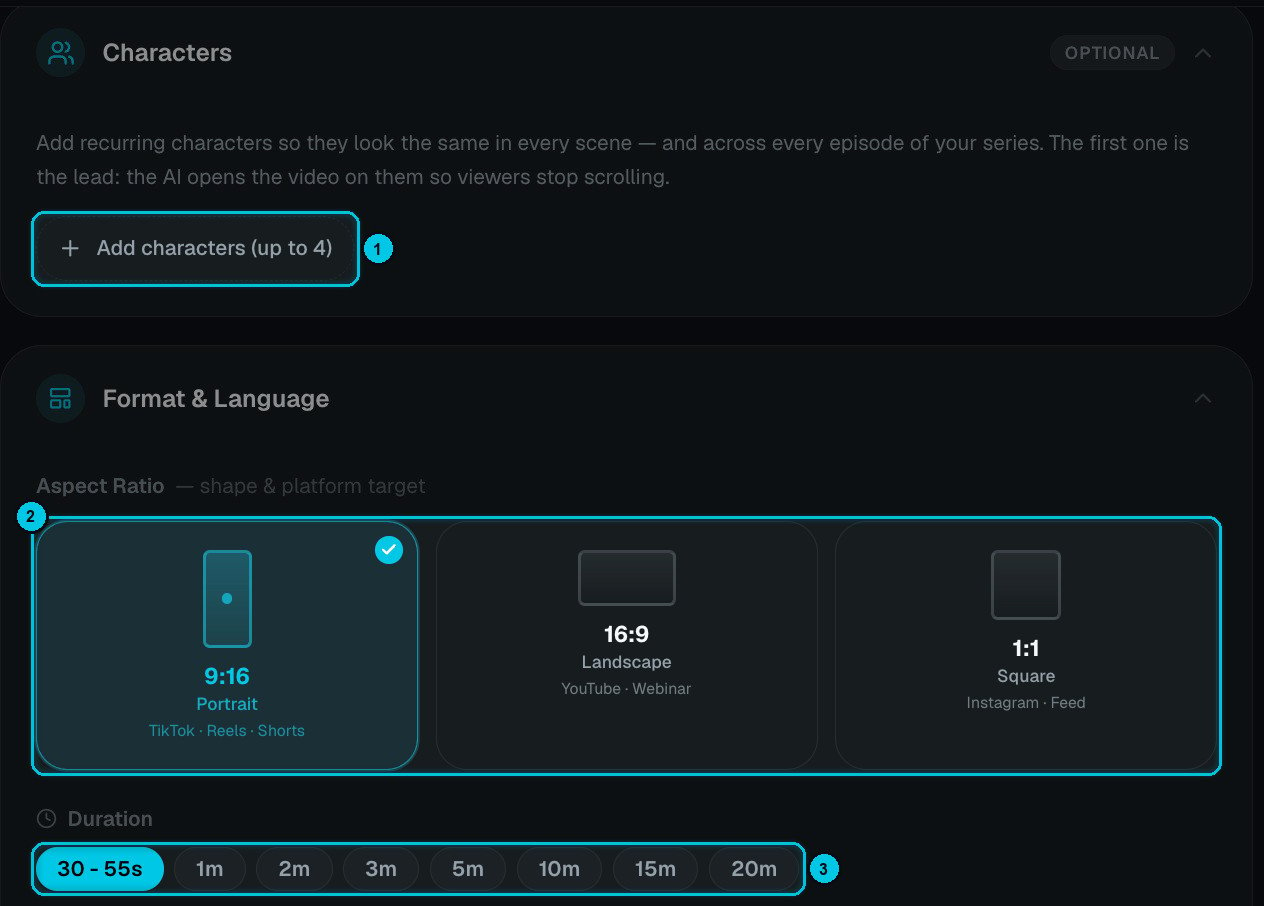
Characters section and aspect ratio cards

① Add characters · ② Aspect ratio · ③ Duration
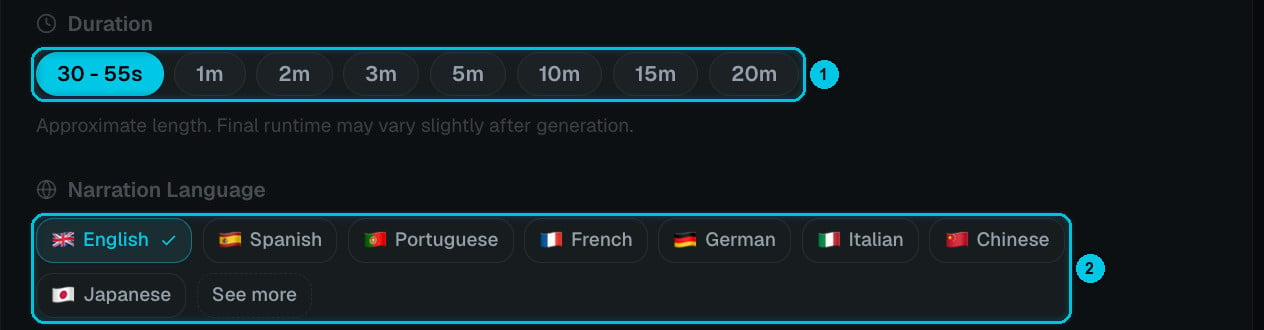
Duration chips from 30 seconds to 20 minutes and language chips

① Duration · ② Narration language

  • Duration — from 30–55 s up to 20 minutes. It’s a target: the final length depends on the narration, so it can vary slightly.
  • Narration language — the language the script is written and spoken in. The most common ones are shown first; See more opens the full list.
6

Pick the image quality

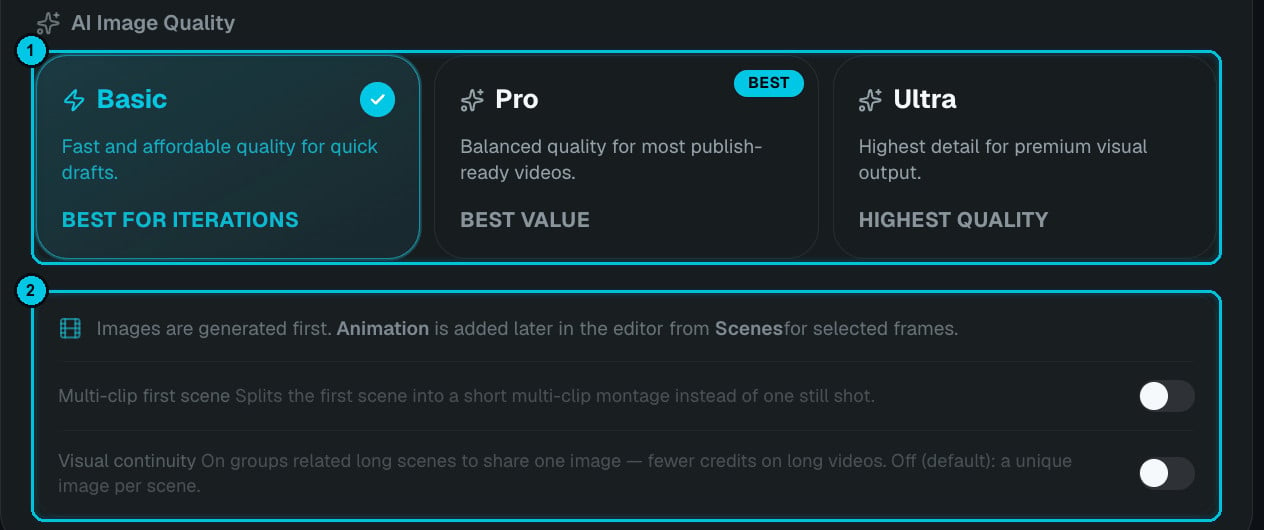
Basic, Pro and Ultra image quality cards

① Image quality · ② Extra options

Two optional switches sit below:
  • Multi-clip first scene — splits the opening scene into a quick montage of shots instead of one still. Great for hooks.
  • Visual continuity — related scenes share one image, which saves credits on long videos. Off by default, so every scene gets its own image.
7

Choose a visual style

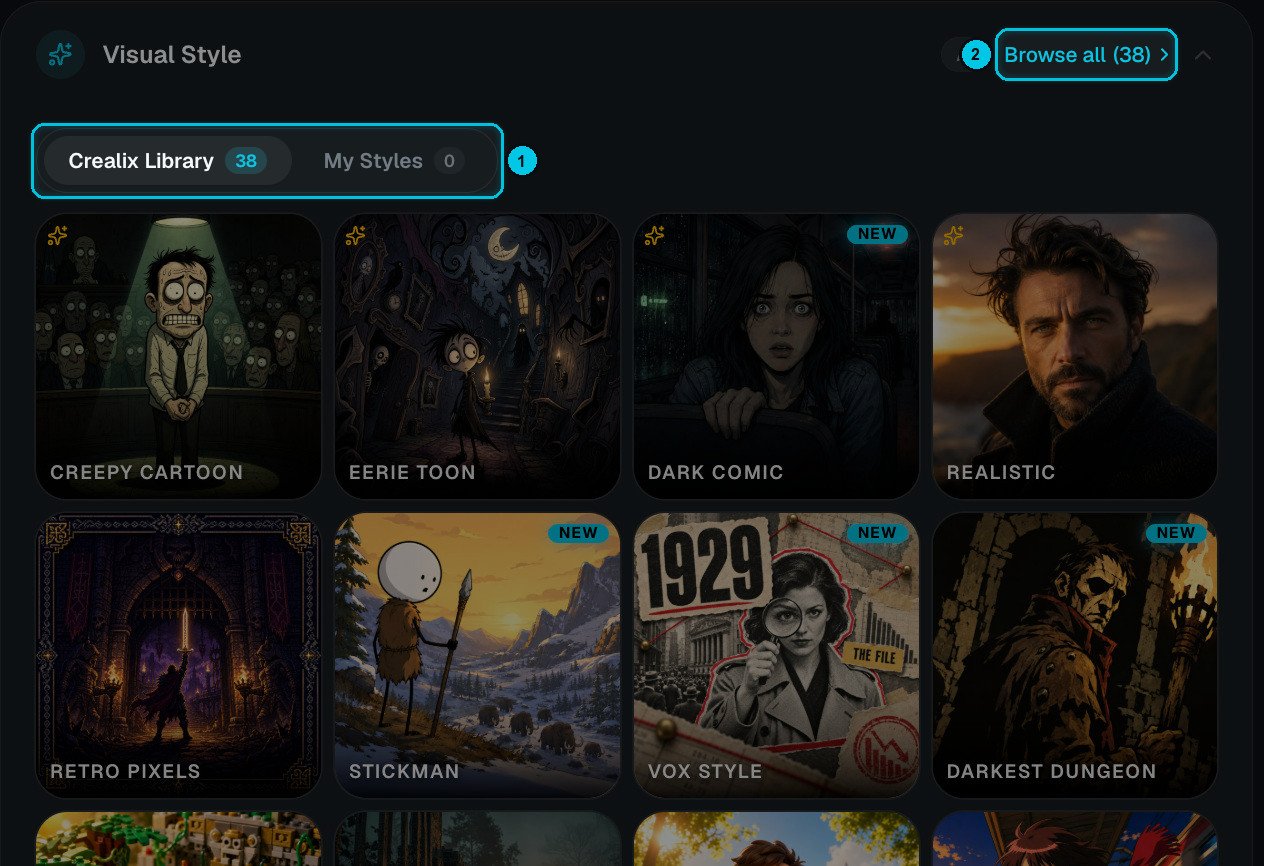
Grid of visual styles such as Creepy Cartoon, Realistic and Stickman

① Crealix Library / My Styles · ② Browse all styles

The style decides how every image looks — from Realistic and Cinematic to Stickman, Lego, Anime Cel or Retro Pixels. Crealix Library has 38 ready-made styles; My Styles holds the ones you create in My Visual Styles. Browse all opens a larger gallery.
8

Choose a voice and tune it

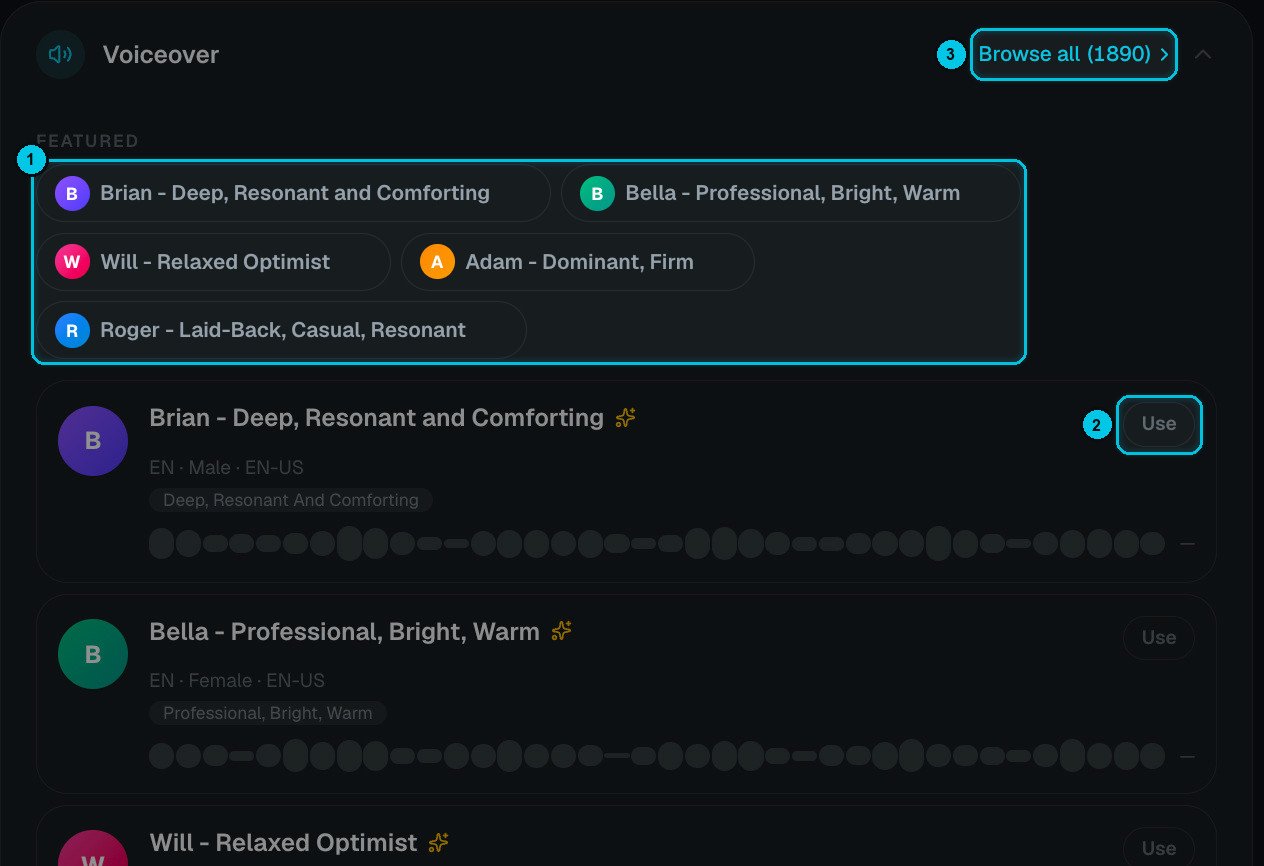
Voiceover section with featured voices

① Featured voices · ② Use · ③ Browse all 1,890
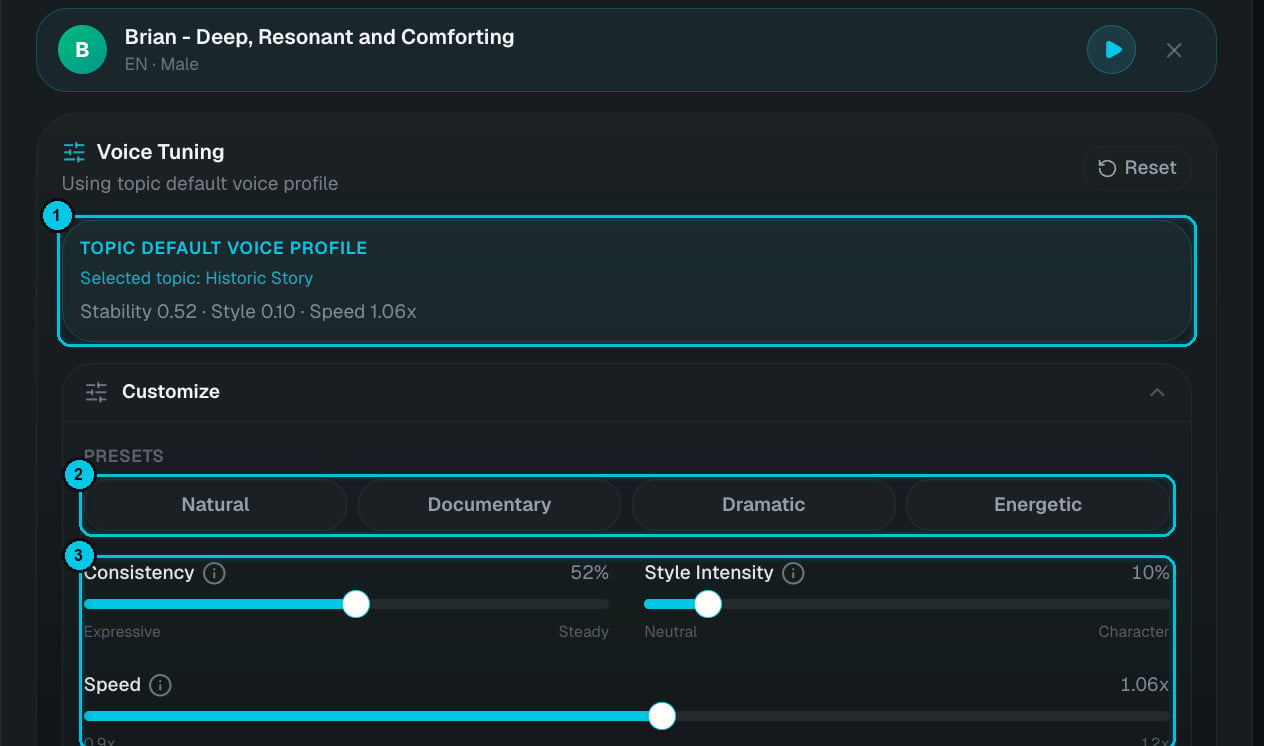
Voice tuning with presets and sliders

① Default profile · ② Presets · ③ Fine-tuning

Press play to hear a voice, then click Use. Once a voice is selected, Voice Tuning appears:
  • Topic default voice profile — Crealix already applies delivery settings that suit your topic (a calmer pace for history, more tension for horror).
  • Presets — Natural, Documentary, Dramatic or Energetic in one click.
  • Consistency (expressive ↔ steady), Style intensity (neutral ↔ character) and Speed (0.9× to 1.2×) for fine control. Preview voice plays a sample with your settings.
You can also use a voice you cloned or designed in My Voices.
9

Add music and captions

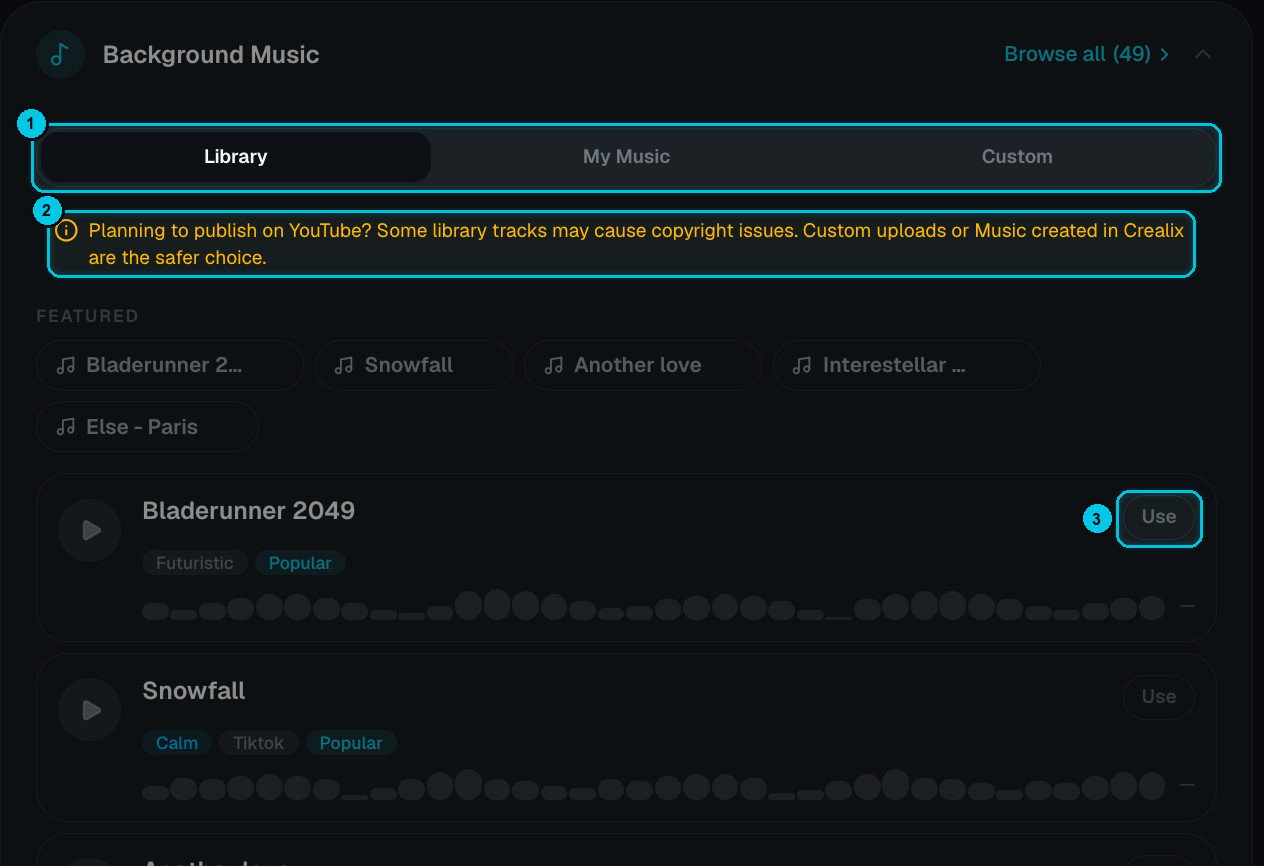
Background music section

① Library / My Music / Custom · ② Copyright note · ③ Use
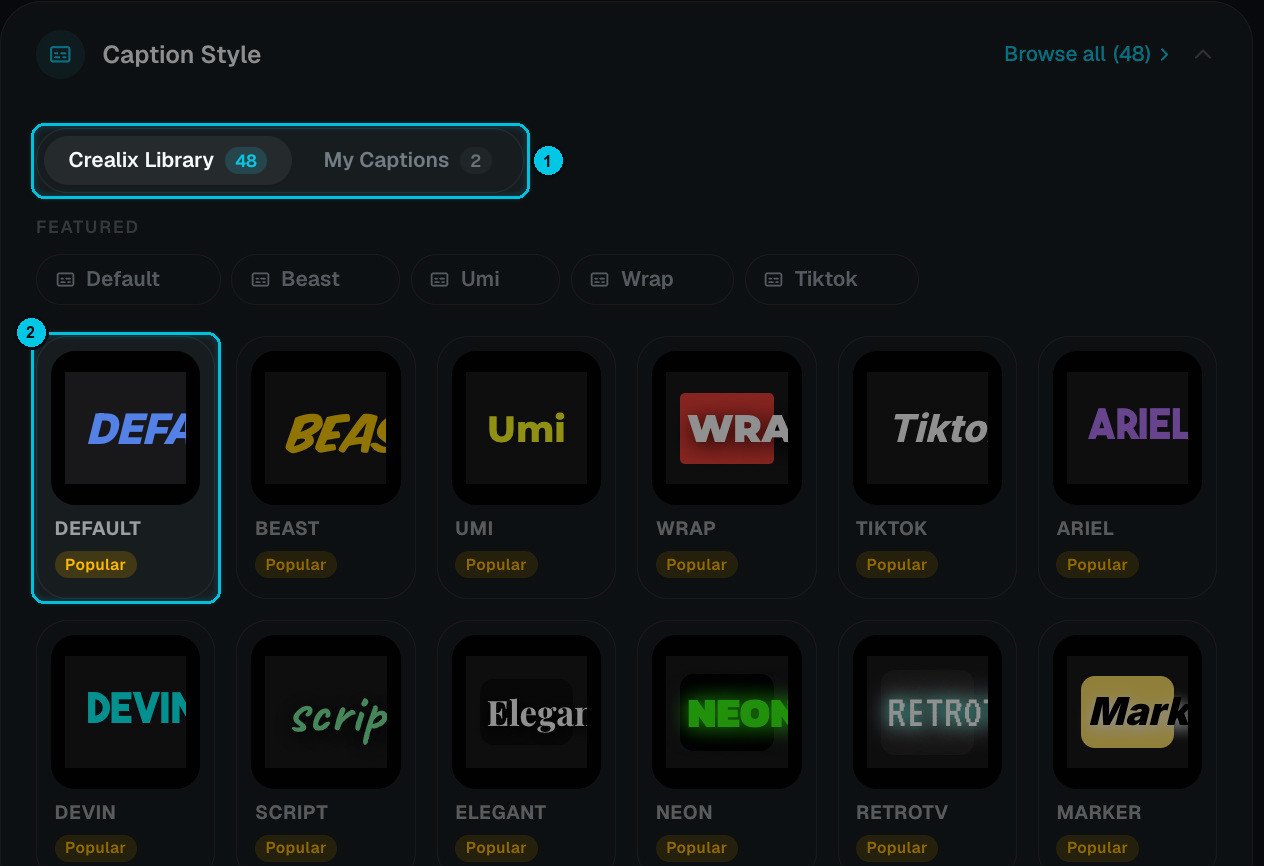
Caption style section

① Library / My Captions · ② Pick a style

  • Background music — 49 curated tracks tagged by mood, your own AI Music tracks, or a custom upload. Planning to publish on YouTube? Prefer your own or Crealix-generated music to avoid copyright claims.
  • Caption style — 48 animated styles, plus any you saved in My Captions. You can change both later in the editor.
10

Choose the generation path

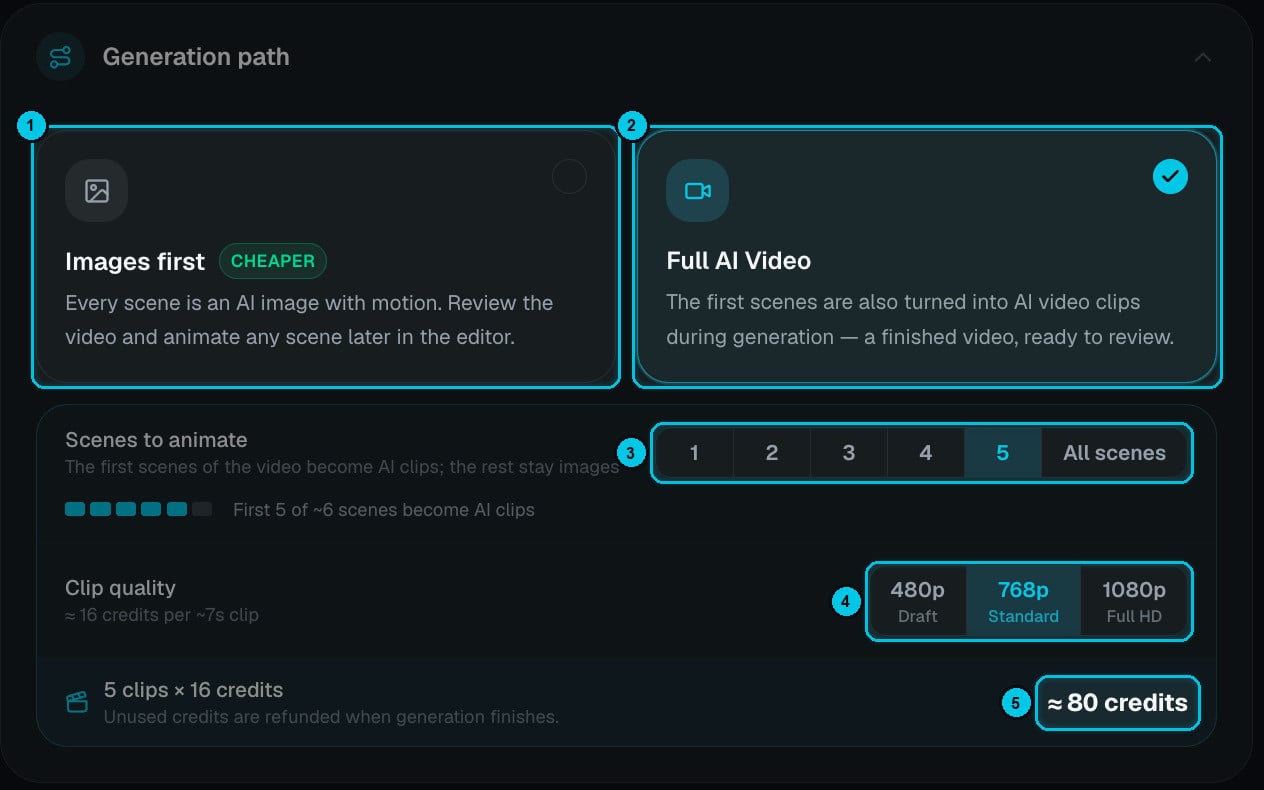
Generation path with Images first and Full AI Video

① Images first · ② Full AI Video · ③ Scenes to animate · ④ Clip quality · ⑤ Estimated cost

  • Images first (①) — every scene is an AI image with camera motion. It’s the cheapest option and you can animate any scene later in the editor.
  • Full AI Video (②) — the first scenes are also turned into real AI video clips during generation. Choose how many scenes to animate (③, from 1 to all) and the clip quality (④: 480p draft, 768p standard or 1080p full HD). The box at the bottom shows the clip cost (⑤).
Credits are reserved when generation starts and settled on the real cost when it finishes — anything unused goes back to your balance automatically.
11

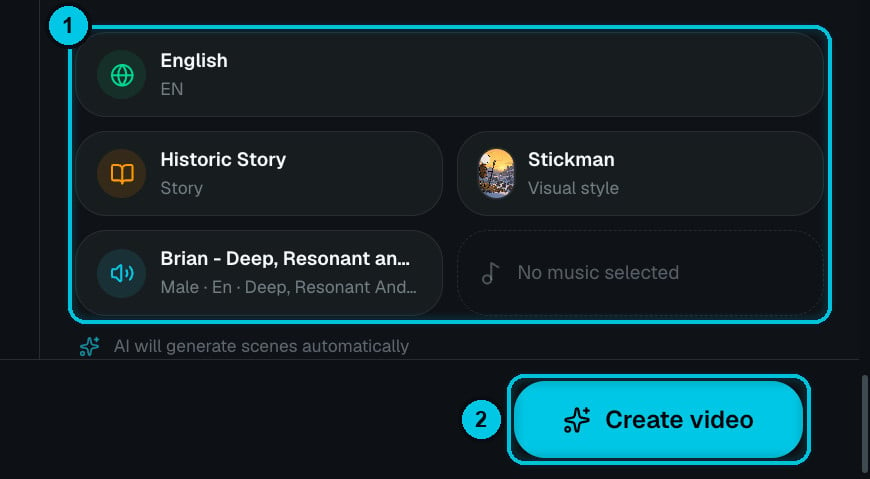
Check the summary and create

Preview summary with language, topic, style, voice and music

① Your choices at a glance · ② Create video

The preview panel lists everything you picked — language, topic, style, voice and music. If something says No … selected, scroll up and fill it in. The bottom bar shows the estimate:
86 credits estimated generation cost
Click Create video. Crealix writes the script, records the narration, generates every scene and lays in captions, music and sound effects. Short videos are usually ready in a few minutes — you can close the tab and come back; you’ll get a notification.
12

Review and edit

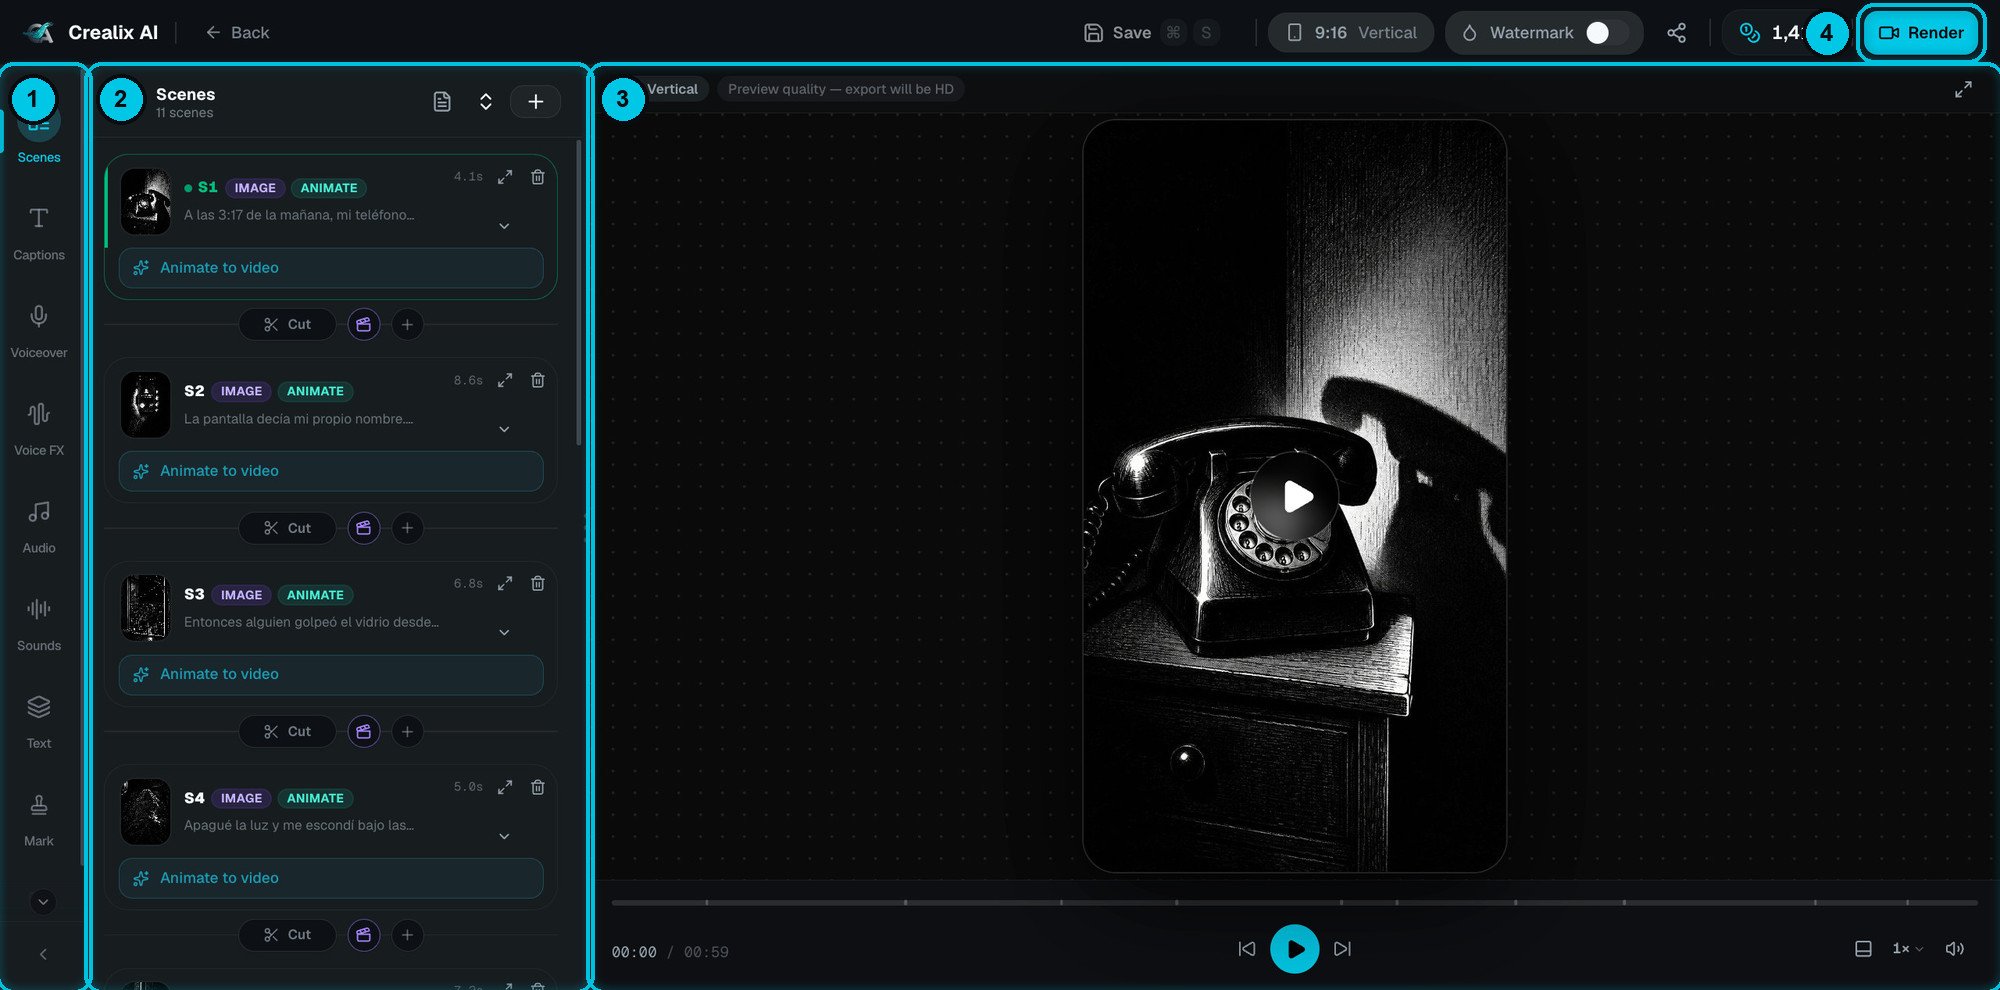
When it’s ready, the video opens in the editor.
The Crealix editor with the Scenes panel open

① Tool rail · ② Panel · ③ Preview · ④ Render

Play it through, then change anything: rewrite a line and re-record it, regenerate or animate a scene, swap the music, restyle the captions or design a cover. Editing is free — you only spend credits when you ask the AI to make something new. See The editor.
13

Render, then download or publish

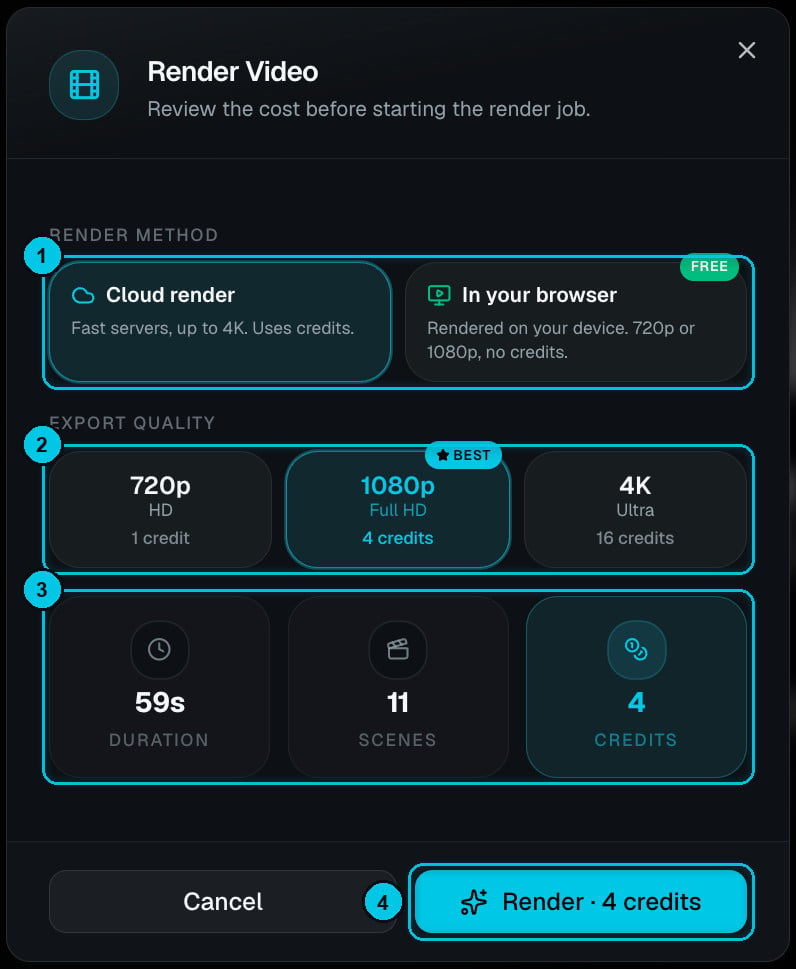
Click Render (④ above) and choose how to export:
Render dialog with cloud render selected

Cloud render — fast, up to 4K, uses credits
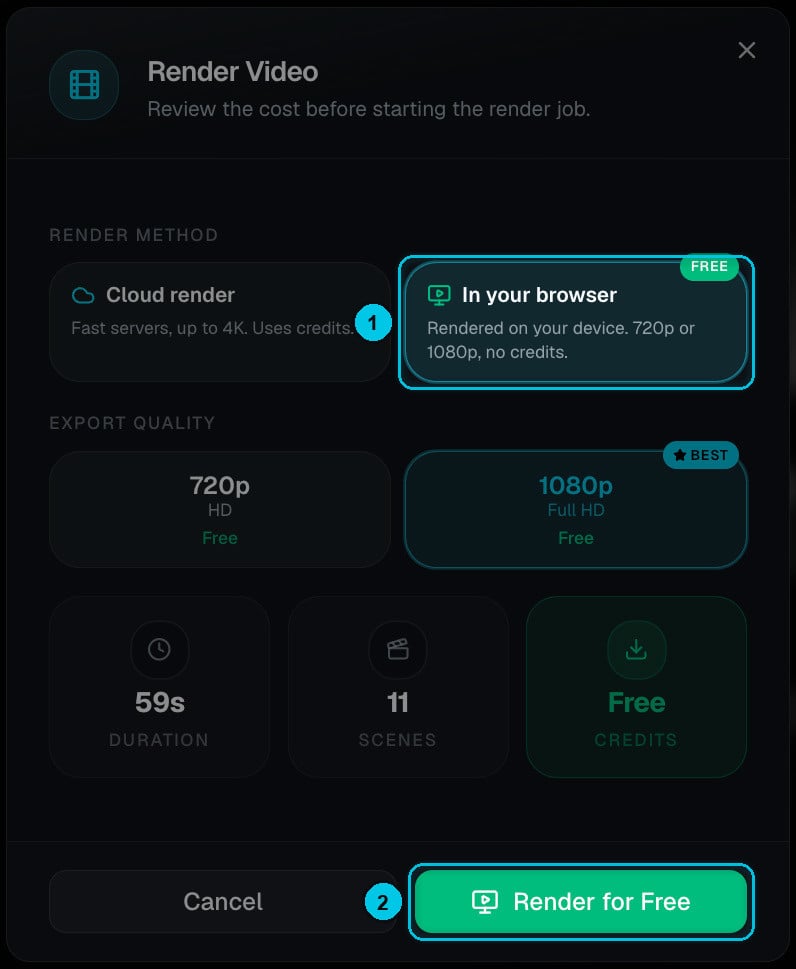
Render dialog with browser render selected

In your browser — free, 720p or 1080p

When it finishes, Download the MP4 or Publish it straight to TikTok, YouTube or Instagram. Details in Render & download and Publish & share.

Watch it end to end

What next?

Explore every format

Reddit stories, fake texts, AI dramas, skeleton videos, music videos and more.

Set your brand defaults

Save your favourite voice, style, captions and logo so every new video starts on-brand.

Put a channel on Autopilot

Create a series once and let Crealix publish new episodes on a schedule.

Understand credits

What things cost, when credits are reserved, and when they are refunded.